i-Phoneナビアプリを作れる。MKDirectionsの簡単な使い方
簡単なナビアプリデモを作った時にMKDirectionsを使用したので簡単に備忘録として書きます。
MKDirectionsは出発地点と到着点を設定すれば簡単にナビアプリを作ることができます。
まずは出発点と到着点の座標をCLLicationCoordinate2Dで作成します。
CLLocationCoordinate2D fromCoordinate = CLLocationCoordinate2DMake(_fromPlaceLuti, _fromPlacelon);
CLLocationCoordinate2D toCoordinate   = CLLocationCoordinate2DMake(_toPlaceLuti, _toPlacelon);
次に作成したCLLocationCoordinate2Dを設定してMKPlaceMarkを作成します。
MKPlacemark *fromPlacemark = [[MKPlacemark alloc]initWithCoordinate:fromCoordinate addressDictionary:nil];
MKPlacemark *toPlacemark   = [[MKPlacemark alloc]initWithCoordinate:toCoordinate addressDictionary:nil];
MKPlaceMarkからMKMapItemを作ります。
MKMapItem *fromItem = [[MKMapItem alloc]initWithPlacemark:fromPlacemark];
MKMapItem *toItem   = [[MKMapItem alloc]initWithPlacemark:toPlacemark];
MKItemをセットしてMKDirectionRequestを作成します。
MKDirectionsRequest *request = [[MKDirectionsRequest alloc]init];
    request.source = fromItem;
    request.destination = toItem;
    request.requestsAlternateRoutes = YES;
MKDirectionRequestからMKDirectionsを作成します。
MKDirections *direction = [[MKDirections alloc]initWithRequest:request];
永らくめんどくさい設定を終えここでようやく経路を検索できるようになります。
[direction calculateDirectionsWithCompletionHandler:^(MKDirectionsResponse *respons,NSError *error){
                [_mapView removeOverlays:[_placemap overlays]];


                if (error) {
                    return ;
                }
                MKRoute *route = [respons.routes objectAtIndex:0];
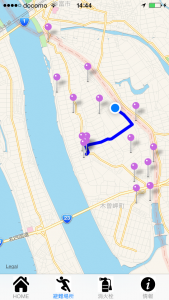
                [_mapView addOverlay:route.polyline];


            }];
MKRouteクラスが返ってくきますので、そのほかにもsteps(歩数かな?)、distance(距離)、expectedTravelTime(所要時間)などが取得できます。
で返って来たら-(MKOverlay *)mapView…が呼ばれるので、描画方法を実行します。
-(MKOverlayRenderer *)mapView:(MKMapView *)mapView rendererForOverlay:(id<MKOverlay>)overlay{
    MKPolyline *route = overlay;
    MKPolylineRenderer *routeRendere = [[MKPolylineRenderer alloc]initWithPolyline:route];
    routeRendere.lineWidth = 5.0;
    routeRendere.strokeColor = [UIColor blueColor];
    return routeRendere;
}
ほーら簡単!
参考にさせていただいたページ


